Engine Removal

Engine Removal

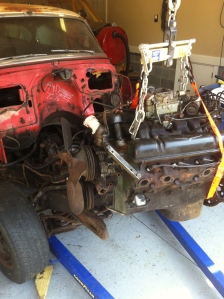
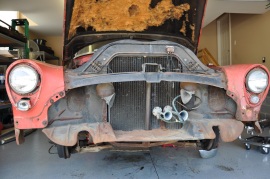
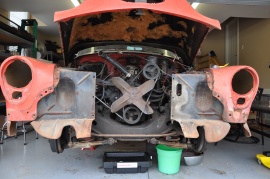
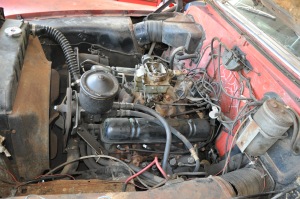
The last few weeks involved more disassembly with the most significant item removed being the engine. This, like most of what I’ve done so far, was a first for me.  So, after researching on the internet for a few days I finally got enough courage to try it.  Thankfully, there are several websites and forums where you can get great “how to” information.  The process went pretty smooth, even in this summertime heat.  Although, I will admit that by the end of the day I was plumb tuckered.

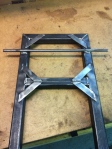
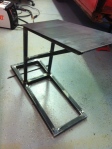
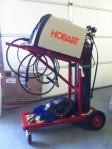
In preparation for metal repair work I have purchased a welder and like most, my first project was a welding cart.  Some pictures below show the progression and the final product.  Having never welded before I was pleased with the result.

Base (upside down)

Almost Finished

Welding Cart Finished

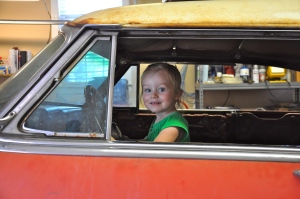
Buick Girl

Welding Practice

I had to practice during the cart build so I managed to find some old bolts and washers and come up with something for my oldest daughter.  She looks great in the Buick!

Posted in 53 Buick Restoration | Tagged , , | Leave a comment

59 Years of Grime

Ever wondered what 59 years of road grime look likes?  Well today I got to find out.  After my parents let me borrow their pressure washer I hooked it up to the hot water in my garage and went to town blasting everything I could reach.  I had soaked the engine compartment with Simple Green before pressure washing and am happy with the results.  The grease and grime came off much easier than I expected, albeit I think most of it landed on my face.  It is nice to see some of that original Buick green paint on the engine.

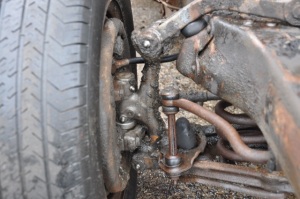
The picture at right shows some suspension parts that could not even be seen prior to washing.  You can see the silver/gray finish (or lack thereof) of the parts.  Of particular interest to me was the orange paint daub at the bottom of one of the suspension pieces (you can see it if you squint).  This is one of the many factory inspection marks that workers made as the parts/car went through the assembly line.  It’s a nice piece of history and I plan to document and recreate them as I restore the parts.  I actually found two others marks that I hadn’t noticed.

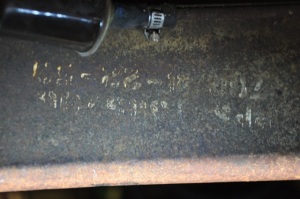
Also, you can see below another mark (stencil) made at the factory that was uncovered by the washing.  This is the frame number located on the right frame rail.  Yes, it is upside down and that is correct.  It appears to provide the model number “76R” and the date  “?-22-53”.  Below this appears to be “PPS” and then what I assume is the serial number but I cannot make it out.  I’ll have to study it some more and see if I can figure it out.

Posted in 53 Buick Restoration, Uncategorized | Tagged | Leave a comment

a LONG TERM project

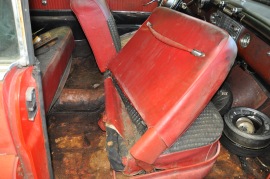
Yes, you are correct – It’s been a little over a year and eight months since I got the car and this is my first post since that first month.  I told myself when I started that this was going to be a long term project, maybe just not quite this long.  However, the good news is that in the time that has passed I’ve been able to upgrade the garage with tools that I need and done a little disassembly along the way.  It’s also been good for me to scour the internet looking for every bit of information I can find on the car and on general restoration principles and methods.  I’ve found the members of the forums at the Antique Automobile Club of America to be invaluable and entertaining.  Check it out at http://forums.aaca.org/.  I’ll leave you with some pictures of disassembly.

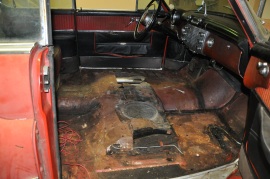
Here the front and rear seats are removed.

More before and after removal….

Hopefully, it won’t be as long before my next post!

Posted in 53 Buick Restoration | Tagged , , | Leave a comment

A Lesson Learned

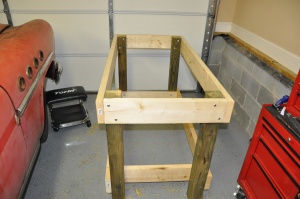
Workbench Frame

This past week provided me some time to build a workbench for my garage.  I wanted a sturdy one that would hold up to all the beating and banging that it is bound to receive and also large enough for a vise and bench grinder.  I ended up deciding to build the frame out of 4×4’s and 2×6’s.  Since it’s going to be pretty heavy when finished I decided to bolt it together which will allow it to be taken apart for moving/storage.
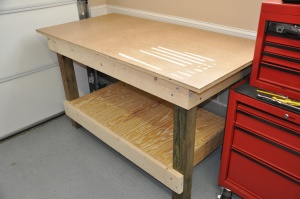
Finished Workbench

I put a 3/4″ top and shelf on it and then also put a 1/4″ piece of masonite on the top.  It probably didn’t need it but I like having the slick, hard top with no splinters.

I’ll be looking for a vise this next week because I know I’m going to need it.  Anybody know any good deals?

Most people probably don’t get too excited about a workbench but for some reason I always like building them.  When you spend all day working on a computer or reading about changes in accounting standards (Yes, I’m an accountant.), it is a welcome break to come home and build something (or tear something apart in the case of the Buick)!
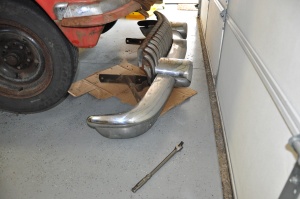
Front Bumper

 The lesson of the week came from my struggles with the front bumper.  I’ve decided one of my first steps in this process will be to take off the chrome and stainless trim on the entire car.  I am going to redo the stainless myself and send the chrome off for replating.  Back to the front bumper, the bolts were a challenge to loosen and I fought for a couple of days with WD40 and a ratchet to no avail.  Then I decided to go and purchase a 1/2″ breaker bar and what do you know the bolt loosens on the first try.  For some people this is probably just common sense but like I said, I’ve been locked up in front of the computer and in the air conditioning too long so it takes me a little longer.  Lesson of the week:  if I’m having a hard time getting something done it’s probably because I don’t have the right tool!  That $20 breaker bar is now my favorite tool.  Oh, and it has a lifetime warranty; you can’t beat that!
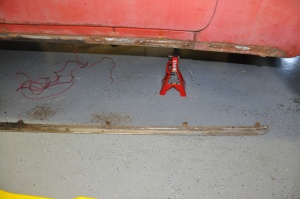
Stainless Trim Removal

Taking the stainless and chrome off should give me a better idea of the condition of the body and the rust situation and I also hear that it takes a long time to get the chrome back from the replater so this seems like a good place to start.  Thus far the rust situation doesn’t seem too bad.  I hope that trend continues.
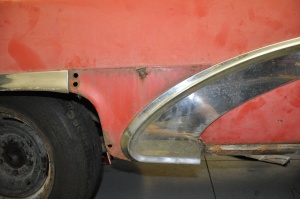
How do I get this off?

I am stuck again though.  The picture to the right shows the piece of trim that I’m having a hard time getting off.  The bottom part of it is loose but the top part is attached and I can’t get to the other side to unbolt the piece that is locking it in place.  Maybe there is a tool for this too and I just don’t know about it yet.  Hopefully, I’ll figure it out soon!

If you can’t tell, I’m really enjoying this!

Posted in 53 Buick Restoration | 6 Comments

A Few Tidbits

I found out a few interesting facts about the car this weekend.  This is a Model 76R – 2 Door Hardtop Coupe that seats 6 people.

322 cid V8 Nailhead

1953 was the first year Buick introduced the V8 engine, a 322 cid V8, also known as a Nailhead.  Total production for this model was 22,927 and this Roadmaster is number 1,170, built in Atlanta.  Factory price was $3,358 and the vehicle shipping weight was 4,125 lbs.   Color is two-tone, majestic white top and matador red body.  Interior is black/red, cloth/vinyl.  The car comes with power windows, which I find amazing for this time period.  The model also had an available option for air conditioning although this one did not come with it.

Also of note is the fact that Howard Hughes drove a similar vehicle, a 1953 Buick Roadmaster (4 door) that was sold at auction on April 2, 2005 for $1.62 Million.  Here’s to hoping that I can do some title research and find out that someone famous owned my car.  I’m hoping for John Wayne!

Posted in 53 Buick Restoration | 1 Comment

What Have I Gotten Myself Into?

Whew, this may take longer than I thought!  My wife says the car doesn’t look as good in person as it did in the pictures.  I think she may just have a tinge of hard feelings because she lost her parking space in the garage.  However, I couldn’t ask for a better wife.  She will keep me on my toes and keep this project moving along.  Thanks Babe for putting up with me and my toys!

Dad and Mom brought the car down last night and he drove it off the trailer and backed it into the garage.  I took a slew of pictures this morning to document where this project started, not to mention the fact that I may need them once I start trying to put it back together.
I’m going to spend the next few days looking over the car, doing some reading, and attempt to come up with a step by step plan to tackle this restoration.  I also need to build a workbench and purchase a few tools I know I will need.  I hope you enjoy keeping up with this as much as I am. Considering the car is 57 years old and has had very little work done to it, I think it’s in great shape.  All of the original parts are intact with the exception of one trim piece on the passenger door.  The transmission, carburetor and exhaust have been rebuilt.  Everything else is original.

This slideshow requires JavaScript.

Posted in 53 Buick Restoration | Tagged , , | Leave a comment